Travis Kirsch
Pixel Pusher Extraordinaire
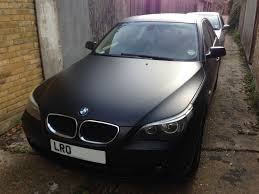
If you're looking to give your car, bike, or even furniture a sleek, modern look, Matte Vinyl Wraps are an excellent choice. Not only do they provide a sophisticated finish, but they're also a cost-effective way to transform the appearance of your possessions without committing to permanent changes. With the right tools and techniques, you can achieve a professional-quality application at home. Here's a step-by-step guide to help you wrap like a pro.
Step 1: Gather Your Tools
Before starting, ensure you have all the necessary tools to make the process smooth and efficient. You'll need:
- Matte vinyl wrap of your choice
- A heat gun or hairdryer
- Squeegee with a felt edge
- Precision cutting knife
- Cleaning solution (isopropyl alcohol works well)
- Microfiber cloth
- Masking tape
Step 2: Prepare the Surface
Proper preparation is key to a flawless finish. Clean the surface thoroughly with isopropyl alcohol to remove dirt, grease, and any residue. Use a microfiber cloth to avoid scratches. If you're wrapping a car, make sure it's parked in a dust-free, shaded area to prevent debris from sticking to the vinyl.
Step 3: Measure and Cut the Vinyl
Measure the area you plan to wrap and cut the vinyl slightly larger than needed. This extra material will give you wiggle room for adjustments and ensure full coverage.
Step 4: Position the Vinyl
Carefully peel off the backing paper and position the vinyl over the surface. Use masking tape to hold it in place if needed. Start at one edge and work your way across, ensuring the vinyl is aligned properly.
Step 5: Apply and Smooth
Using your squeegee, begin applying the vinyl by pressing it down gently in small sections. Work from the center outward to push out air bubbles and wrinkles. If bubbles persist, lift the vinyl slightly and reapply it while smoothing it out.
Step 6: Use Heat for Curves
For curved or uneven surfaces, use a heat gun or hairdryer to make the vinyl more pliable. Apply gentle heat while stretching and smoothing the material over the surface. Be careful not to overheat, as this can cause the vinyl to warp or tear.
Step 7: Trim Excess Vinyl
Once the vinyl is applied, use a precision cutting knife to trim any excess material along edges or seams. Take your time with this step to avoid cutting too much or damaging the surface underneath.(www.vinylcarwrapshop.com)
Step 8: Seal and Finish
After trimming, go over the entire surface with your squeegee one last time to ensure everything is securely adhered. Apply heat lightly around edges and corners for extra sealing.
Final Tips
- Patience is key! Rushing can lead to mistakes.
- Practice on smaller objects before attempting larger projects like cars.
- If you're not satisfied with the result, vinyl wraps are forgiving—simply peel it off and try again.
With these steps, you can achieve a professional-looking matte finish that enhances the style of your vehicle or item. Not only will you save money by doing it yourself, but you'll also have the satisfaction of creating something unique with your own hands!